This post may contain affiliate links. Please see our disclosure policy.
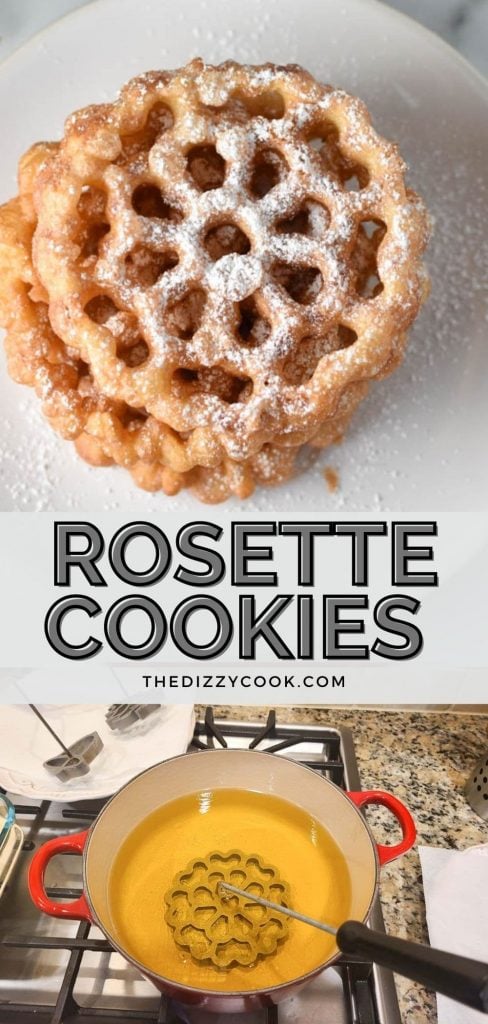
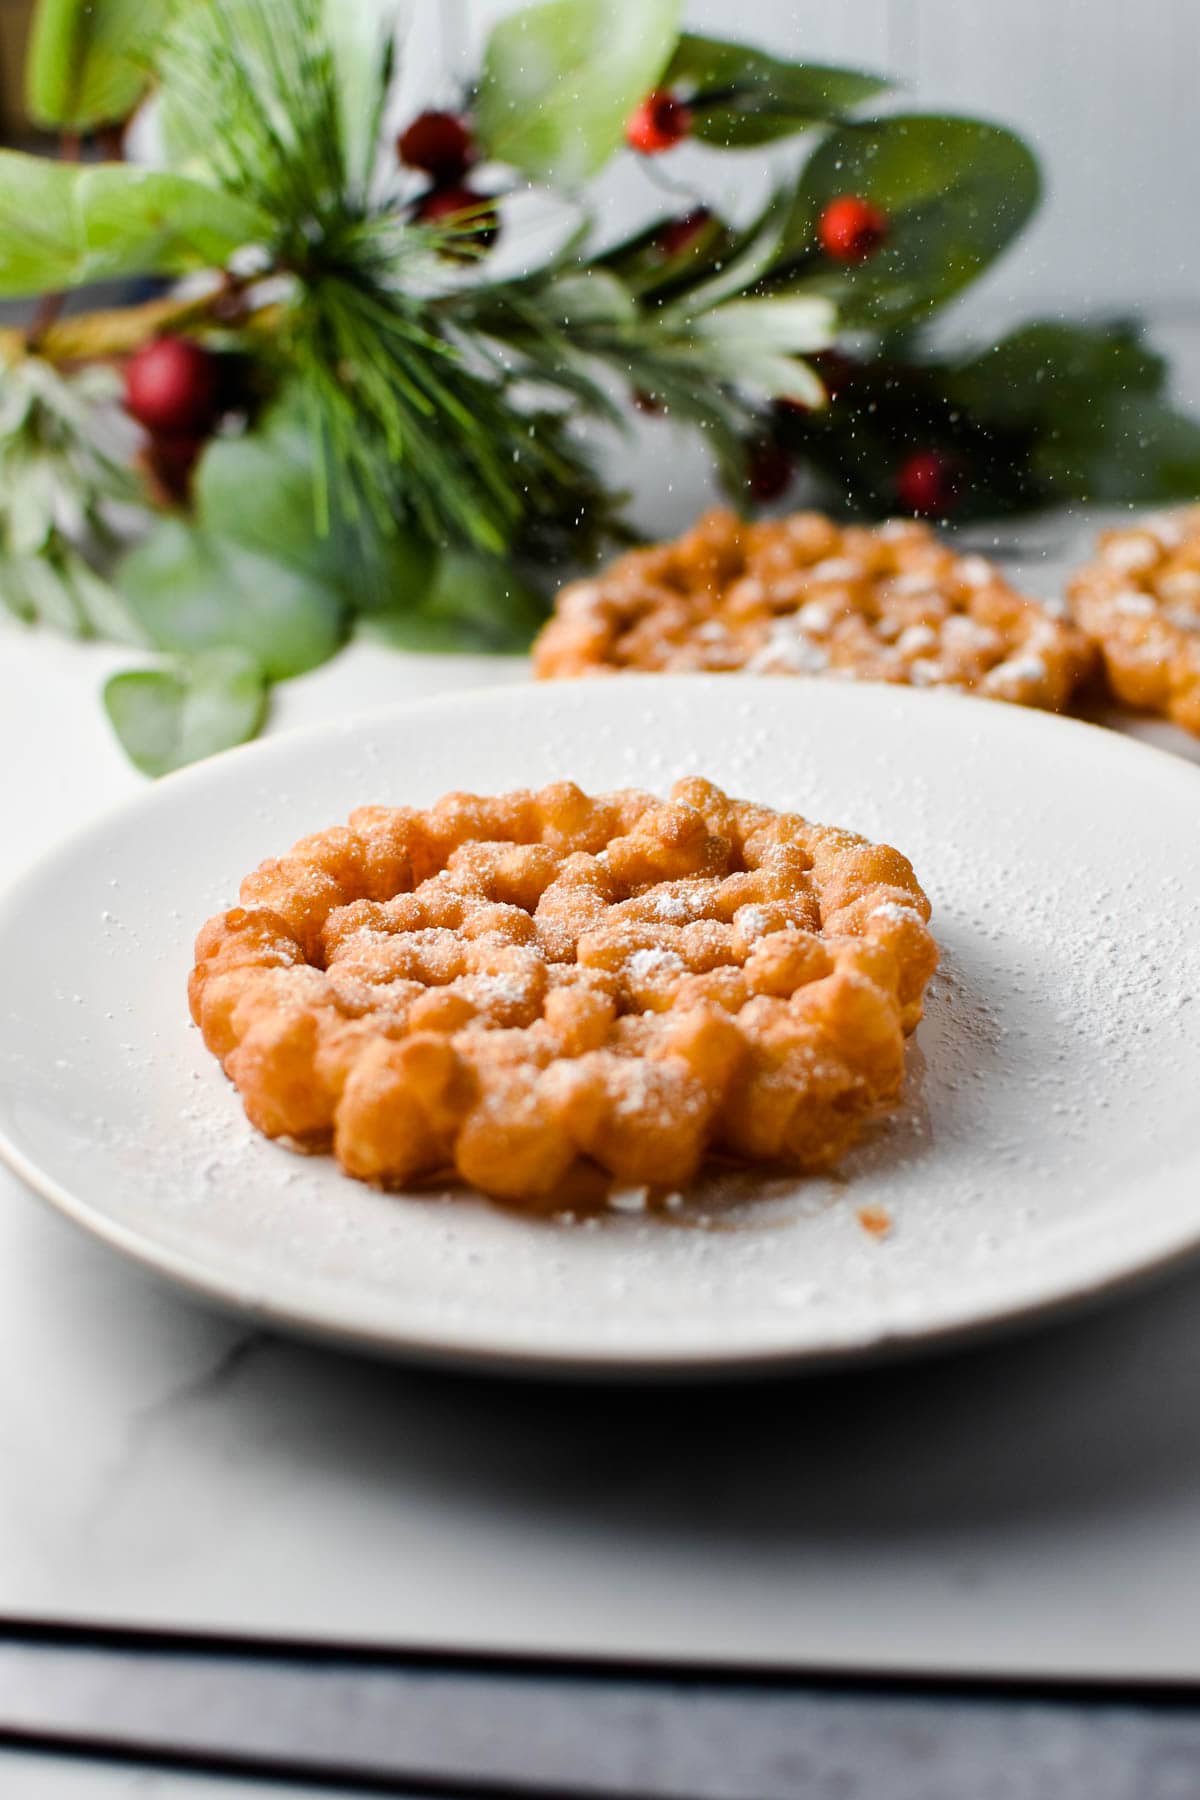
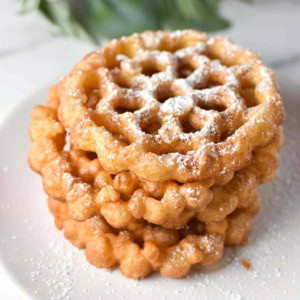
Light and crispy, these rosette cookies are the perfect Christmas cookie that taste like a crispy funnel cake! Made with 7 basic pantry ingredients and ready in under 30 minutes, they’re dusted with powdered sugar for the perfect snowy finish.
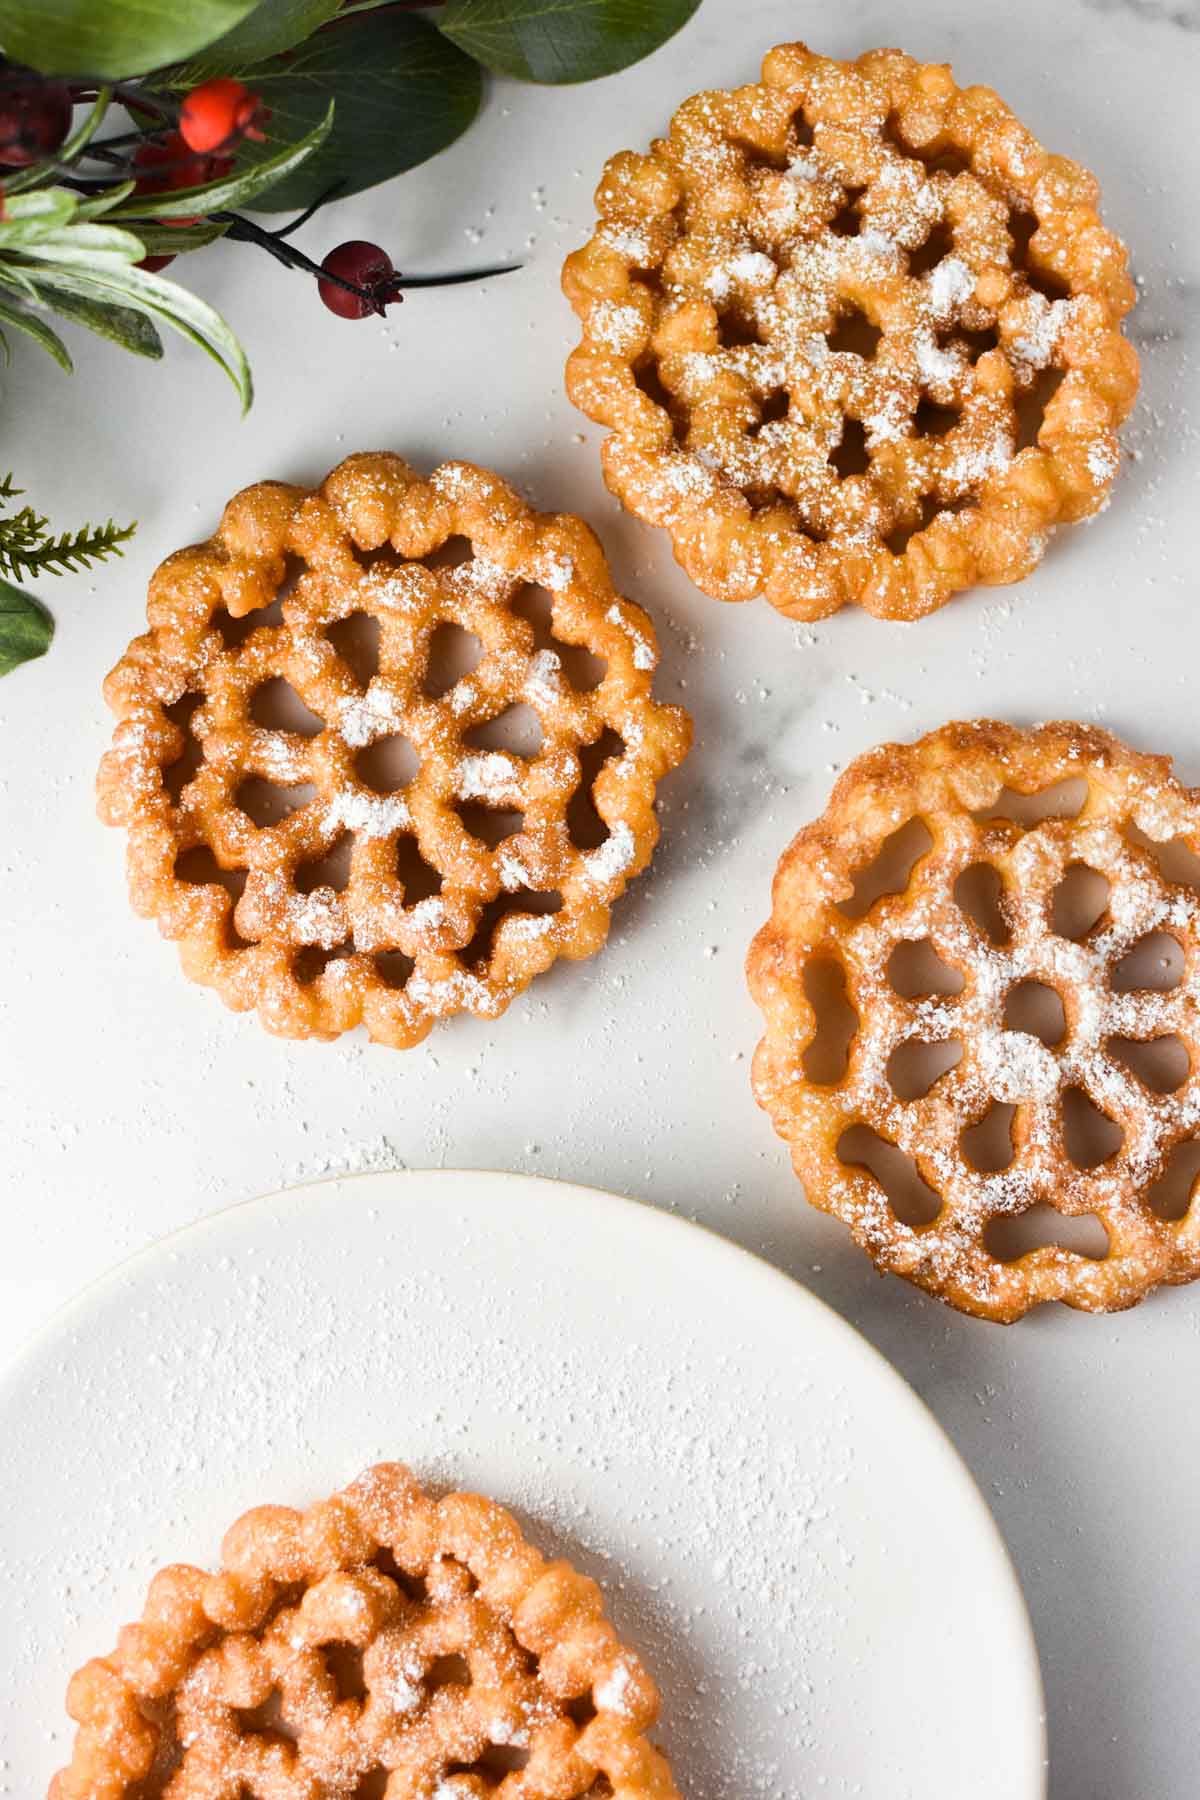
This is is based on a traditional Scandinavian recipe, and you can use different types of rosette irons to create different patterns. Even though it’s fried, they are incredibly light and very fast to make!
Quick Look
- Minimal ingredients – Basic pantry ingredients of sugar, eggs, flour, milk, and oil.
- Low sugar cookie – Only 2 teaspoons!
- Easy – Once you get the hang of it, they’re very easy and go quickly – only 1-2 minutes to cook.
- Family fun – They’re a fun project to do with family or kids for the holidays. It’s a recipe I’ve made through the years with my mom and grandmother.
- Customizable – You can top them with powdered sugar, fruit, melted chocolate or whatever you like!
Table of Contents
Ingredients
Here are a few details on the ingredients with amounts given in the recipe card.
- All Purpose flour – Any all purpose kind will work for this recipe. I have used Gold Medal and Bob’s Red Mill Organic. You must sift it! Sifting the flour is important to prevent clumping.
- Sugar – Use regular granulated white cane sugar, like Domino.
- Milk – This is essential for the batter but you could use whole milk or substitute your favorite plant based milk to make these dairy free. I recommend oat milk for the best texture.
- Eggs – Just make sure they are large.
- Vegetable or Canola Oil – You need a vegetable oil that works well for frying and high heat.
- Vanilla Extract – This is optional, but adds a lovely flavor.
- Powdered sugar or confectioners sugar – This is optional but makes these cookies really beautiful!
Rosette Cookie Irons
For this recipe, you need both rosette cookie irons and a good candy or frying thermometer. A deep, heavy bottomed pot, like a dutch oven, is also really helpful to keep the oil for splattering too much. The irons come in many different choices!
- Rosette Cookie Iron
- Heart Iron
- A Snowflake (very Frozen inspired for the kiddos)
- A Star
- A Candy/Deep Fryer Thermometer
How to Make
- Start by prepping a large pot with oil and making the batter. To a shallow dish or medium bowl, add sugar to the lightly beaten eggs, then add in the milk. Sift flour with the salt, then stir into the egg mixture, beating until smooth. This should be a consistency comparable to heavy cream. Stir in the vanilla extract.
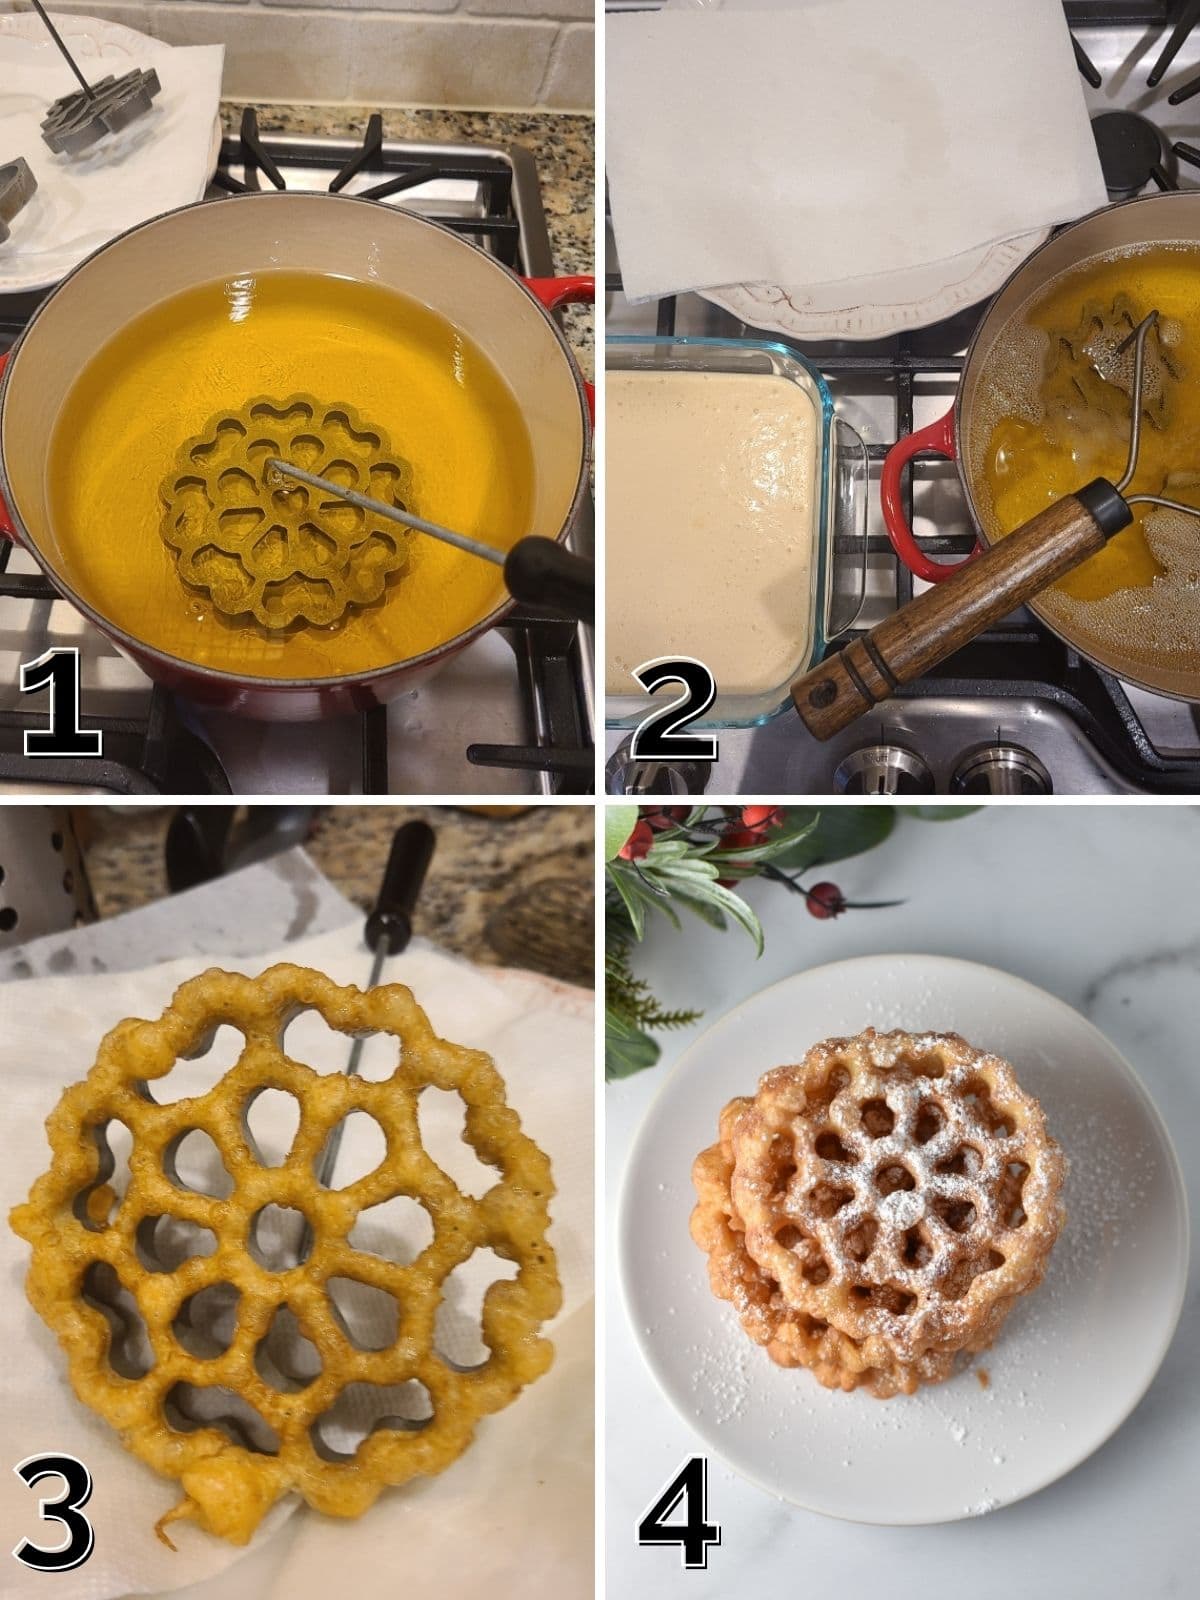
- In a heavy pot like a dutch oven or deep fryer, add about 2 inches of vegetable oil. Heat to 375 degrees F on your candy or deep fryer thermometer for about 1-2 minutes. Do not get too hot or it will burn your batter! Attach the iron molds to the handle and immerse in the hot oil until heated. Shake off any excess oil or blot onto a paper towel (this will help the batter adhere better), then place the iron into the rosette batter ONLY to the depth of the mold and not covering the top of the iron mold.
- Place the dipped mold into the hot oil and fry for about 30 seconds or until golden brown – the foamy bubbling should subside after the initial frying so you can see. Lift the iron out and allow any excess oil to drip back into the fryer. Gently tap on the rosette or use a knife to loosen it onto a paper towel.
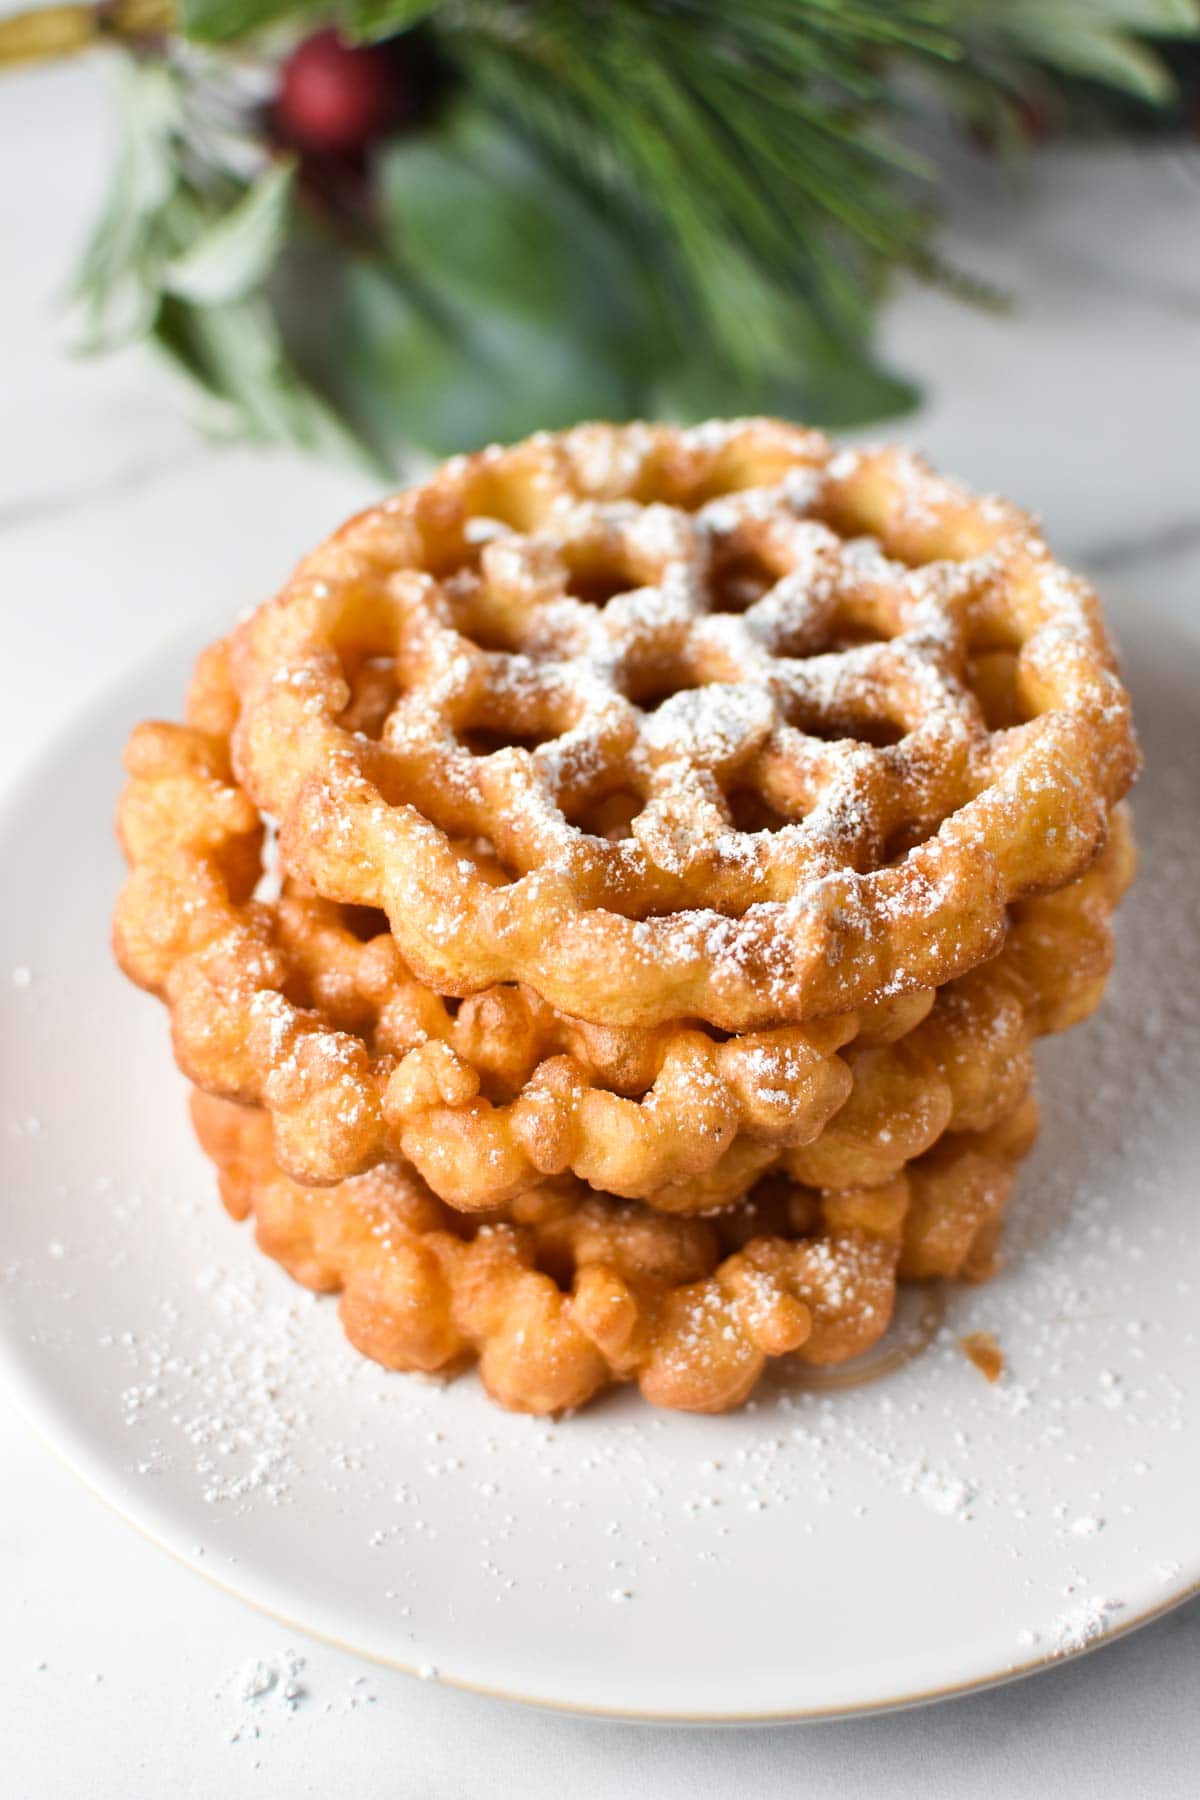
- Cool rosettes with the open side down on a cookie rack or paper towel. Enjoy a sprinkling of powdered sugar, if desired.
Tips for Success
While the ingredients for this recipe are very simple, the technique is what gets tricky when it comes to these cookies. If you’re a little out of practice, it takes one or two to get the hang of frying these cookies. Here are some troubleshooting tips so you can learn from my mistakes.
- Rosettes must be completely submerged in the oil or else they will fall off the iron.
- Avoid getting the batter on top of the rosette iron. If this does happen, you can fry as usual and then gently remove with a knife to release it, but it’s easier to just avoid this in the first place
- You must use a thermometer to get the oil to be the right temperature of 375 degrees F. If the oil is too hot or too cold, the batter will not adhere properly to the rosette iron.
- Keep a plate with a paper towel next to your fryer so once the iron is heated in the oil, you can “blot” the excess oil before dipping into your batter. This will help the batter adhere better.
- If your cookies are not crispy, you may need to thin out the batter with a little milk. But first check your temperature as that is typically the issue. You also may need to extend the frying time.
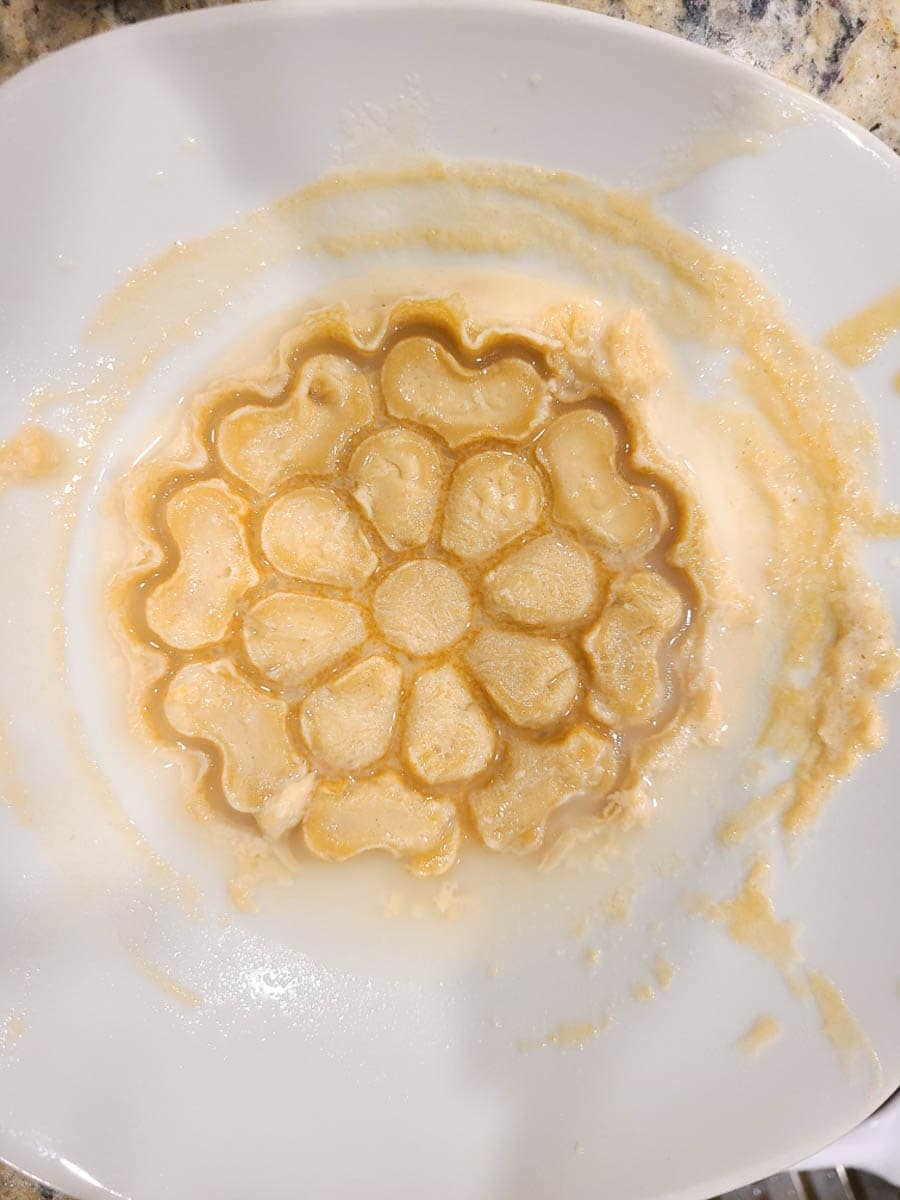
- Maintaining the proper temperature is important also for dipping the hot iron into the batter. If it is too hot, you will cook your batter! (see picture below)
- If your rosette cookie gets stuck to the iron, just use a table knife to gently loosen it. It should drop right off. If it does not, fry a little bit longer.
Storage Instructions
Despite being fried, these actually store quite well. Start by allowing them to cool, open side down, on a paper towel or a cookie rack. These are best eaten right away, dusted with powdered sugar.
Room temperature – Layer the cookies, using parchment or wax paper between them, and store in an airtight container for up to 3 days. You do not need to store these in the fridge.
Freezer – Use the same layering method, but store in a freezer container or bag (just be careful laying anything on top of them so they don’t get broken or smashed). No need to defrost them for long – they can be reheated from frozen.
How To Reheat Rosette Cookies to Crispy
It’s important you watch these carefully as they reheat in the oven as they defrost and cook very quickly. If you do plan to store them and reheat, I recommend not dusting them with powdered sugar until they’re ready to serve.
Reheating from frozen – Place cookies on a baking sheet covered with parchment paper. Bake at 300 degrees Fahrenheit or 150 Celsius for 3-5 minutes until nice and crispy. If reheating from fresh, bake for just 1-2 minutes.
Recipe FAQ
If the iron is not hot enough by placing it into the oil before the batter, the batter will not adhere to it. At the same time, if the iron is too hot, it will cook the batter in the bowl. This is where a thermometer is helpful till you get the hang of it.
I have not personally tried this recipe substituting 1:1 gluten free flour, but would love any feedback if you do!
Holiday Cookie Recipes

Love this recipe? Please leave a 5-star 🌟🌟🌟🌟🌟 review in the recipe card! Don’t forget to tag me @thedizzycook on Facebook and Instagram, and follow along on Pinterest for more great recipes!
Rosette Cookies
Ingredients
- 2 teaspoons sugar
- 2 large eggs, slightly beaten
- 1 cup sifted flour
- 1/4 teaspoon salt (table salt)
- 1 cup milk
- 2½ teaspoons vanilla extract
- vegetable oil or canola oil
- powdered sugar
Instructions
- Add sugar to the slightly beaten eggs, then add in the milk. Sift flour with the salt, then stir into the egg mixture, beating until smooth. This should be a consistency comparable to heavy cream. Add in the vanilla extract, stirring till just combined.
- In a heavy pot like a dutch oven or deep fryer, add about 2 inches of vegetable oil. Heat to 375 degrees F on your candy or deep fryer thermometer for about 1-2 minutes. Do not get too hot or it will burn your batter! Attach the rosette iron molds to the handle and immerse in the hot oil until heated. Shake off any excess oil or blot onto a paper towel (this will help the batter adhere better), then place the iron into the batter ONLY to the depth of the mold and not covering the top of the iron mold.
- Place the dipped iron mold into the hot oil and fry for about 30 seconds or until golden brown – the foamy bubbling should subside after the initial frying so you can see. Lift the iron out and allow any excess oil to drip back into the fryer. Gently tap on the rosette or use a knife to loosen it onto a paper towel.
- Cool rosettes with the open side down on a cookie rack or paper towel. Dust with powdered sugar, if desired.
Notes
- If your first rosette cookies are not crispy, thin out the batter with a little more milk.
- If your batter is not adhering to the molds or they are not crisping, check the temperature to make sure you’re at 375 degrees and that your mold is getting hot enough.
- Reheat at 300 degrees F for 1-2 minutes from fresh, or 3-5 from frozen.
Nutrition
Nutrition information is automatically calculated, so should only be used as an approximation.


I use granulated sugar on my rose g test. can I still free,e them once they’ve been sugared?
Hey – I think you’re asking if you can freeze them with powdered sugar? I’m not sure I understand…but yes, you can freeze them either way.
Hi All Gluten Free Rosette Makers:
I made this recipe with Maverickmill Gluten Free Flour. The rosettes turned out perfect. Tip: remember to keep your oil Hot! Good luck!
Thank you for the tip!
Alicia The recipe turned out fantastic. luv the cookies. However …I still have batter remaining – can I store this for another day or two? Many thanks Dorothy
Hey! Absolutely you can store it for another day. I haven’t tried two but let me know how it goes if you do.
Beautiful, crispy, delicious! Love these for Christmas.
This was my first attempt at making Rosettes and they turned out beautifully!!! I followed your recipe and read all of your tips. I am ready to do another batch to share with family and friends.
Thank you, Jen! So glad it was successful! I tried to be as specific as possible to help make it easy.
Loved making these with my kids over thanksgiving. Sprinkled with powdered sugar for “snow” and also some cinnamon sugar too. YUM!
Thanks, Bailey! So glad you guys enjoyed it!
These were delicious and beautiful! Thank you for the tips